DIY Cardboard Marquee Sign!
Why spend $100 buying a custom marquee sign when you can spend 10 hours making one? I’m only kidding of course. It took me 3 hours.
BUT! I don’t want you to fret. It only took me that long because I was figuring it out as I went. This project should take you anywhere from 30 minutes - 2 hours, depending on the complexity of your marquee sign. Let’s get started!


Materials:
Cardboard
Scissors/x-acto knife
Fairy lights (with at least 100 LED lights total)
Tape
Pencil
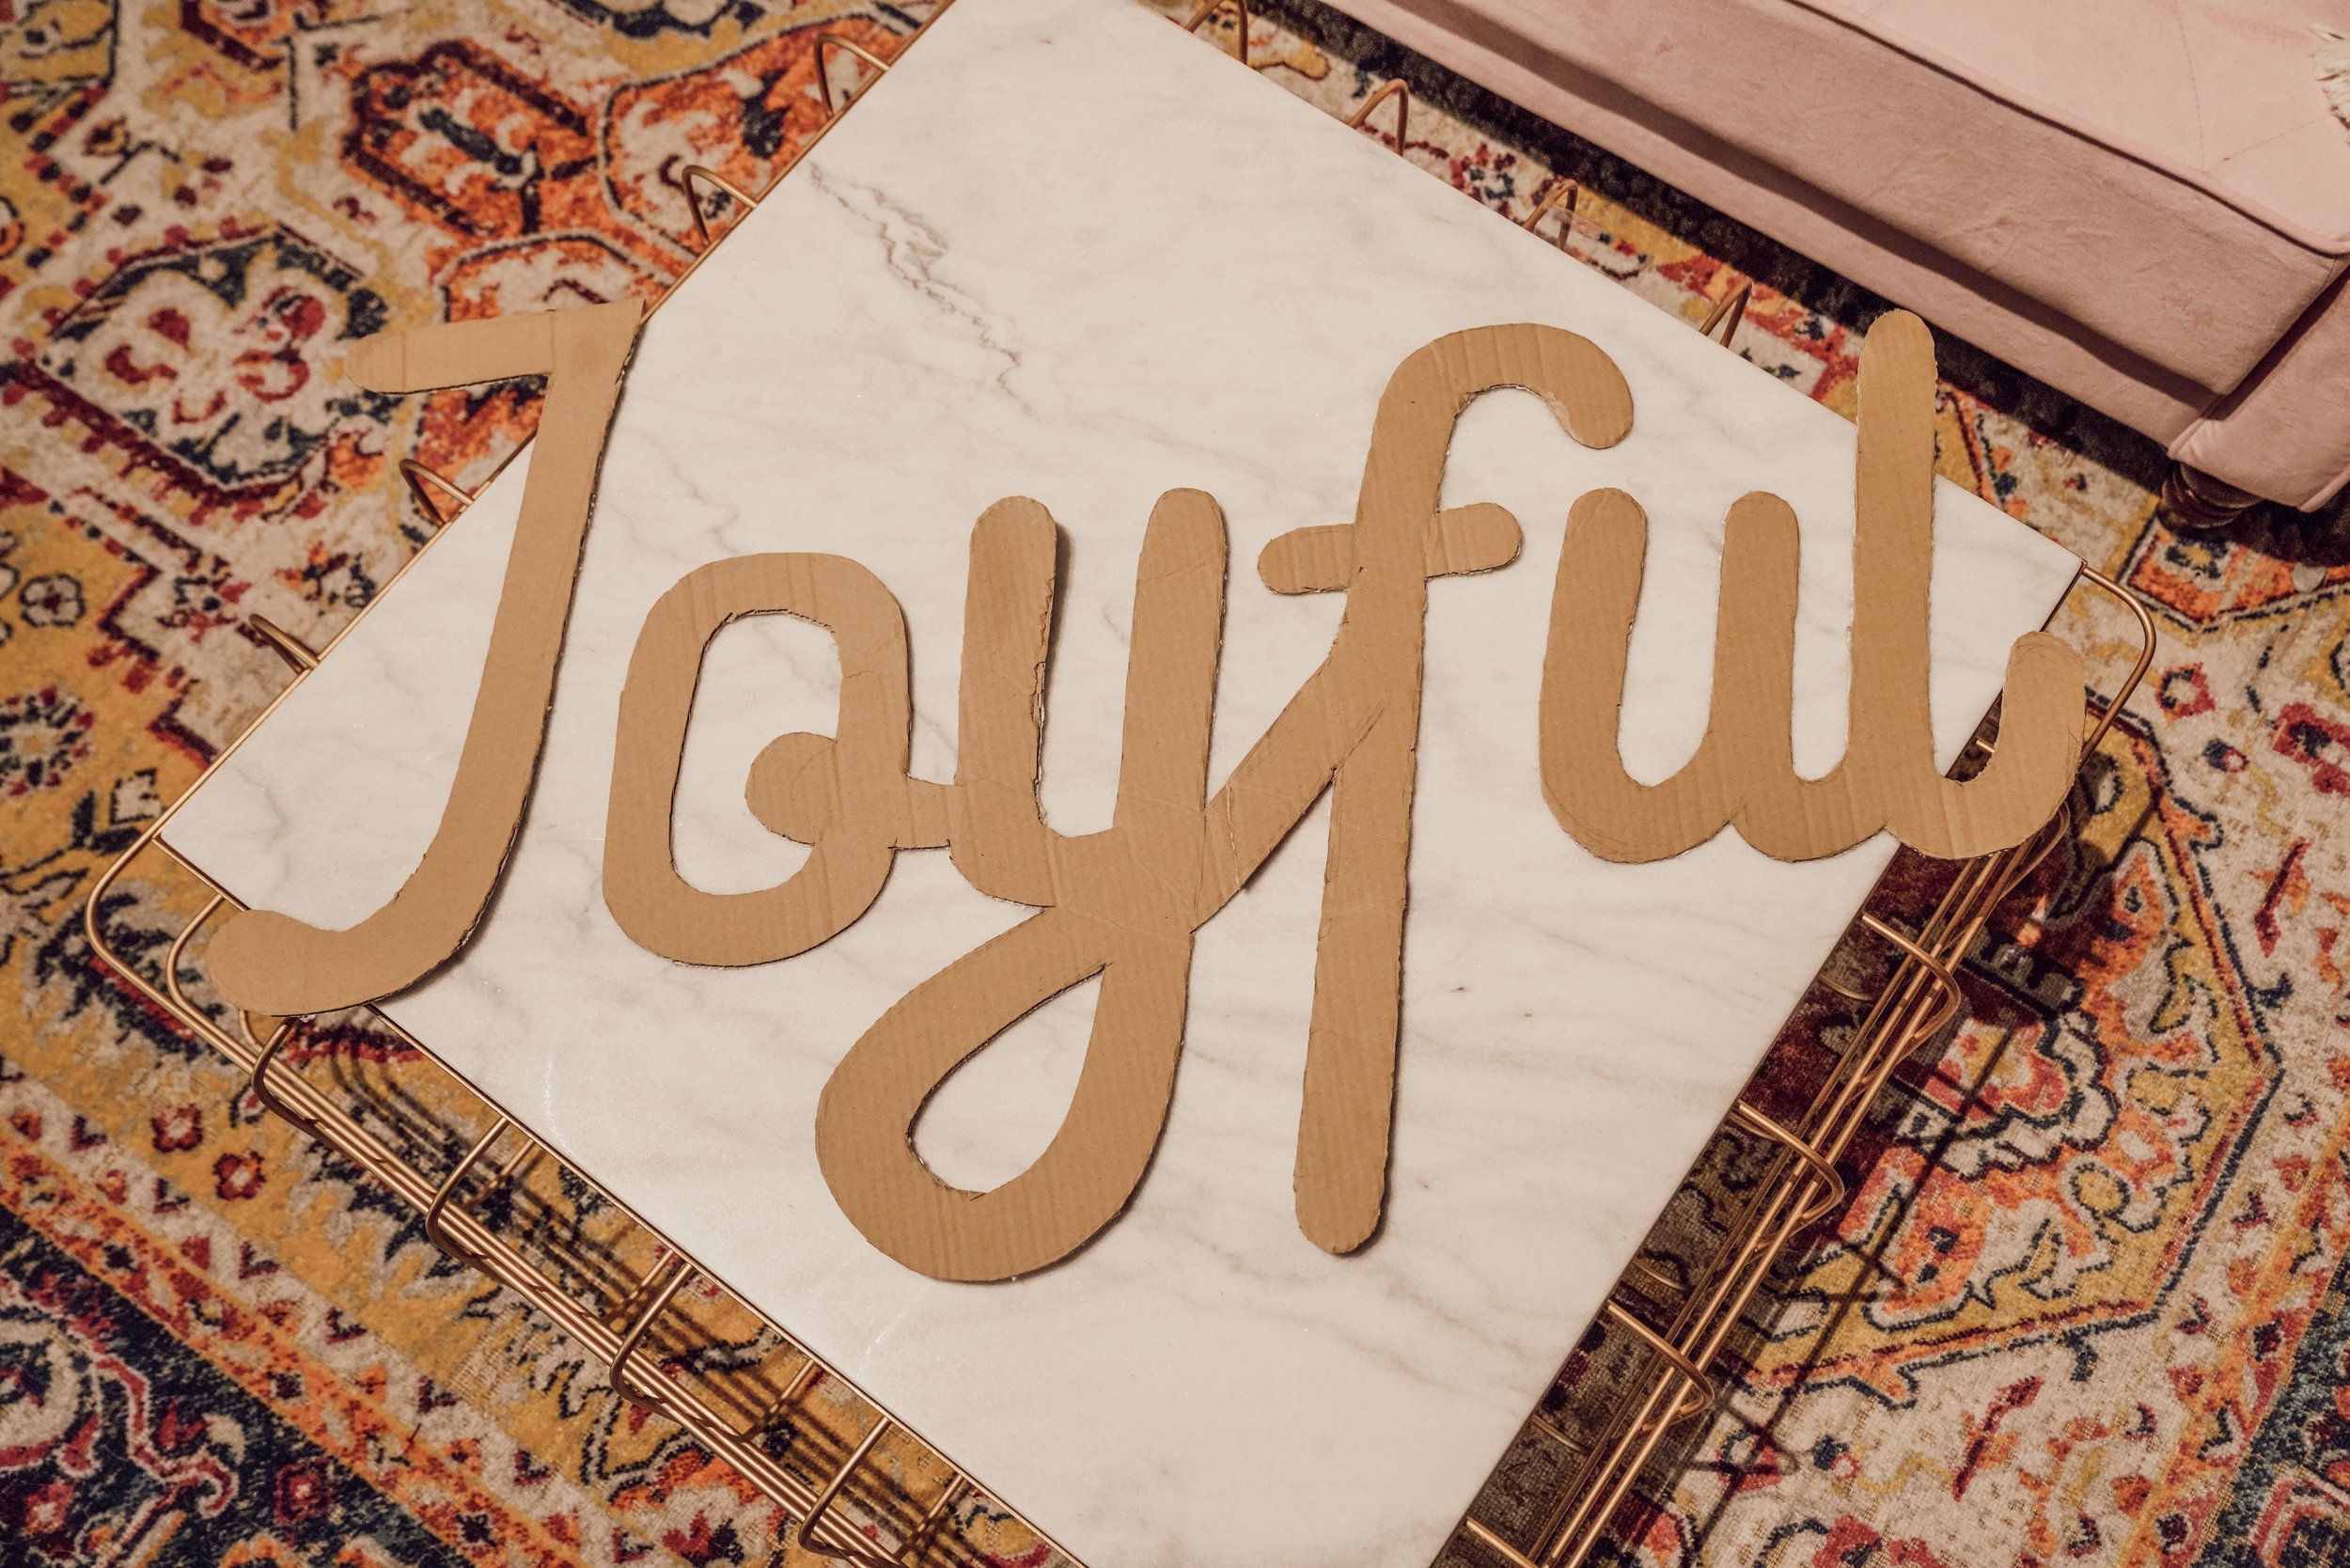
1. Draw the outline on cardboard using pencil
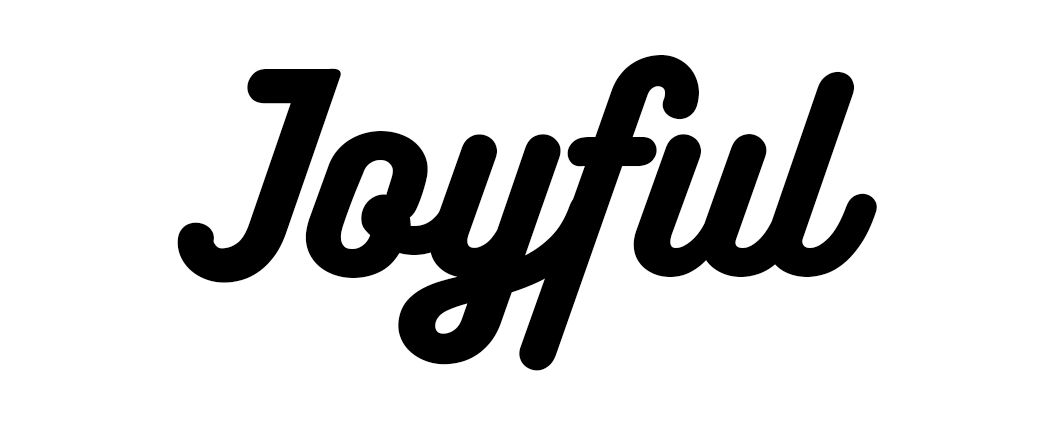
Feel free to use my chosen word and font below to create your sign! The font is called Bukhari Script.

2. Cut it out with scissors and an X-acto knife
Make it as clean of a cut as possible.
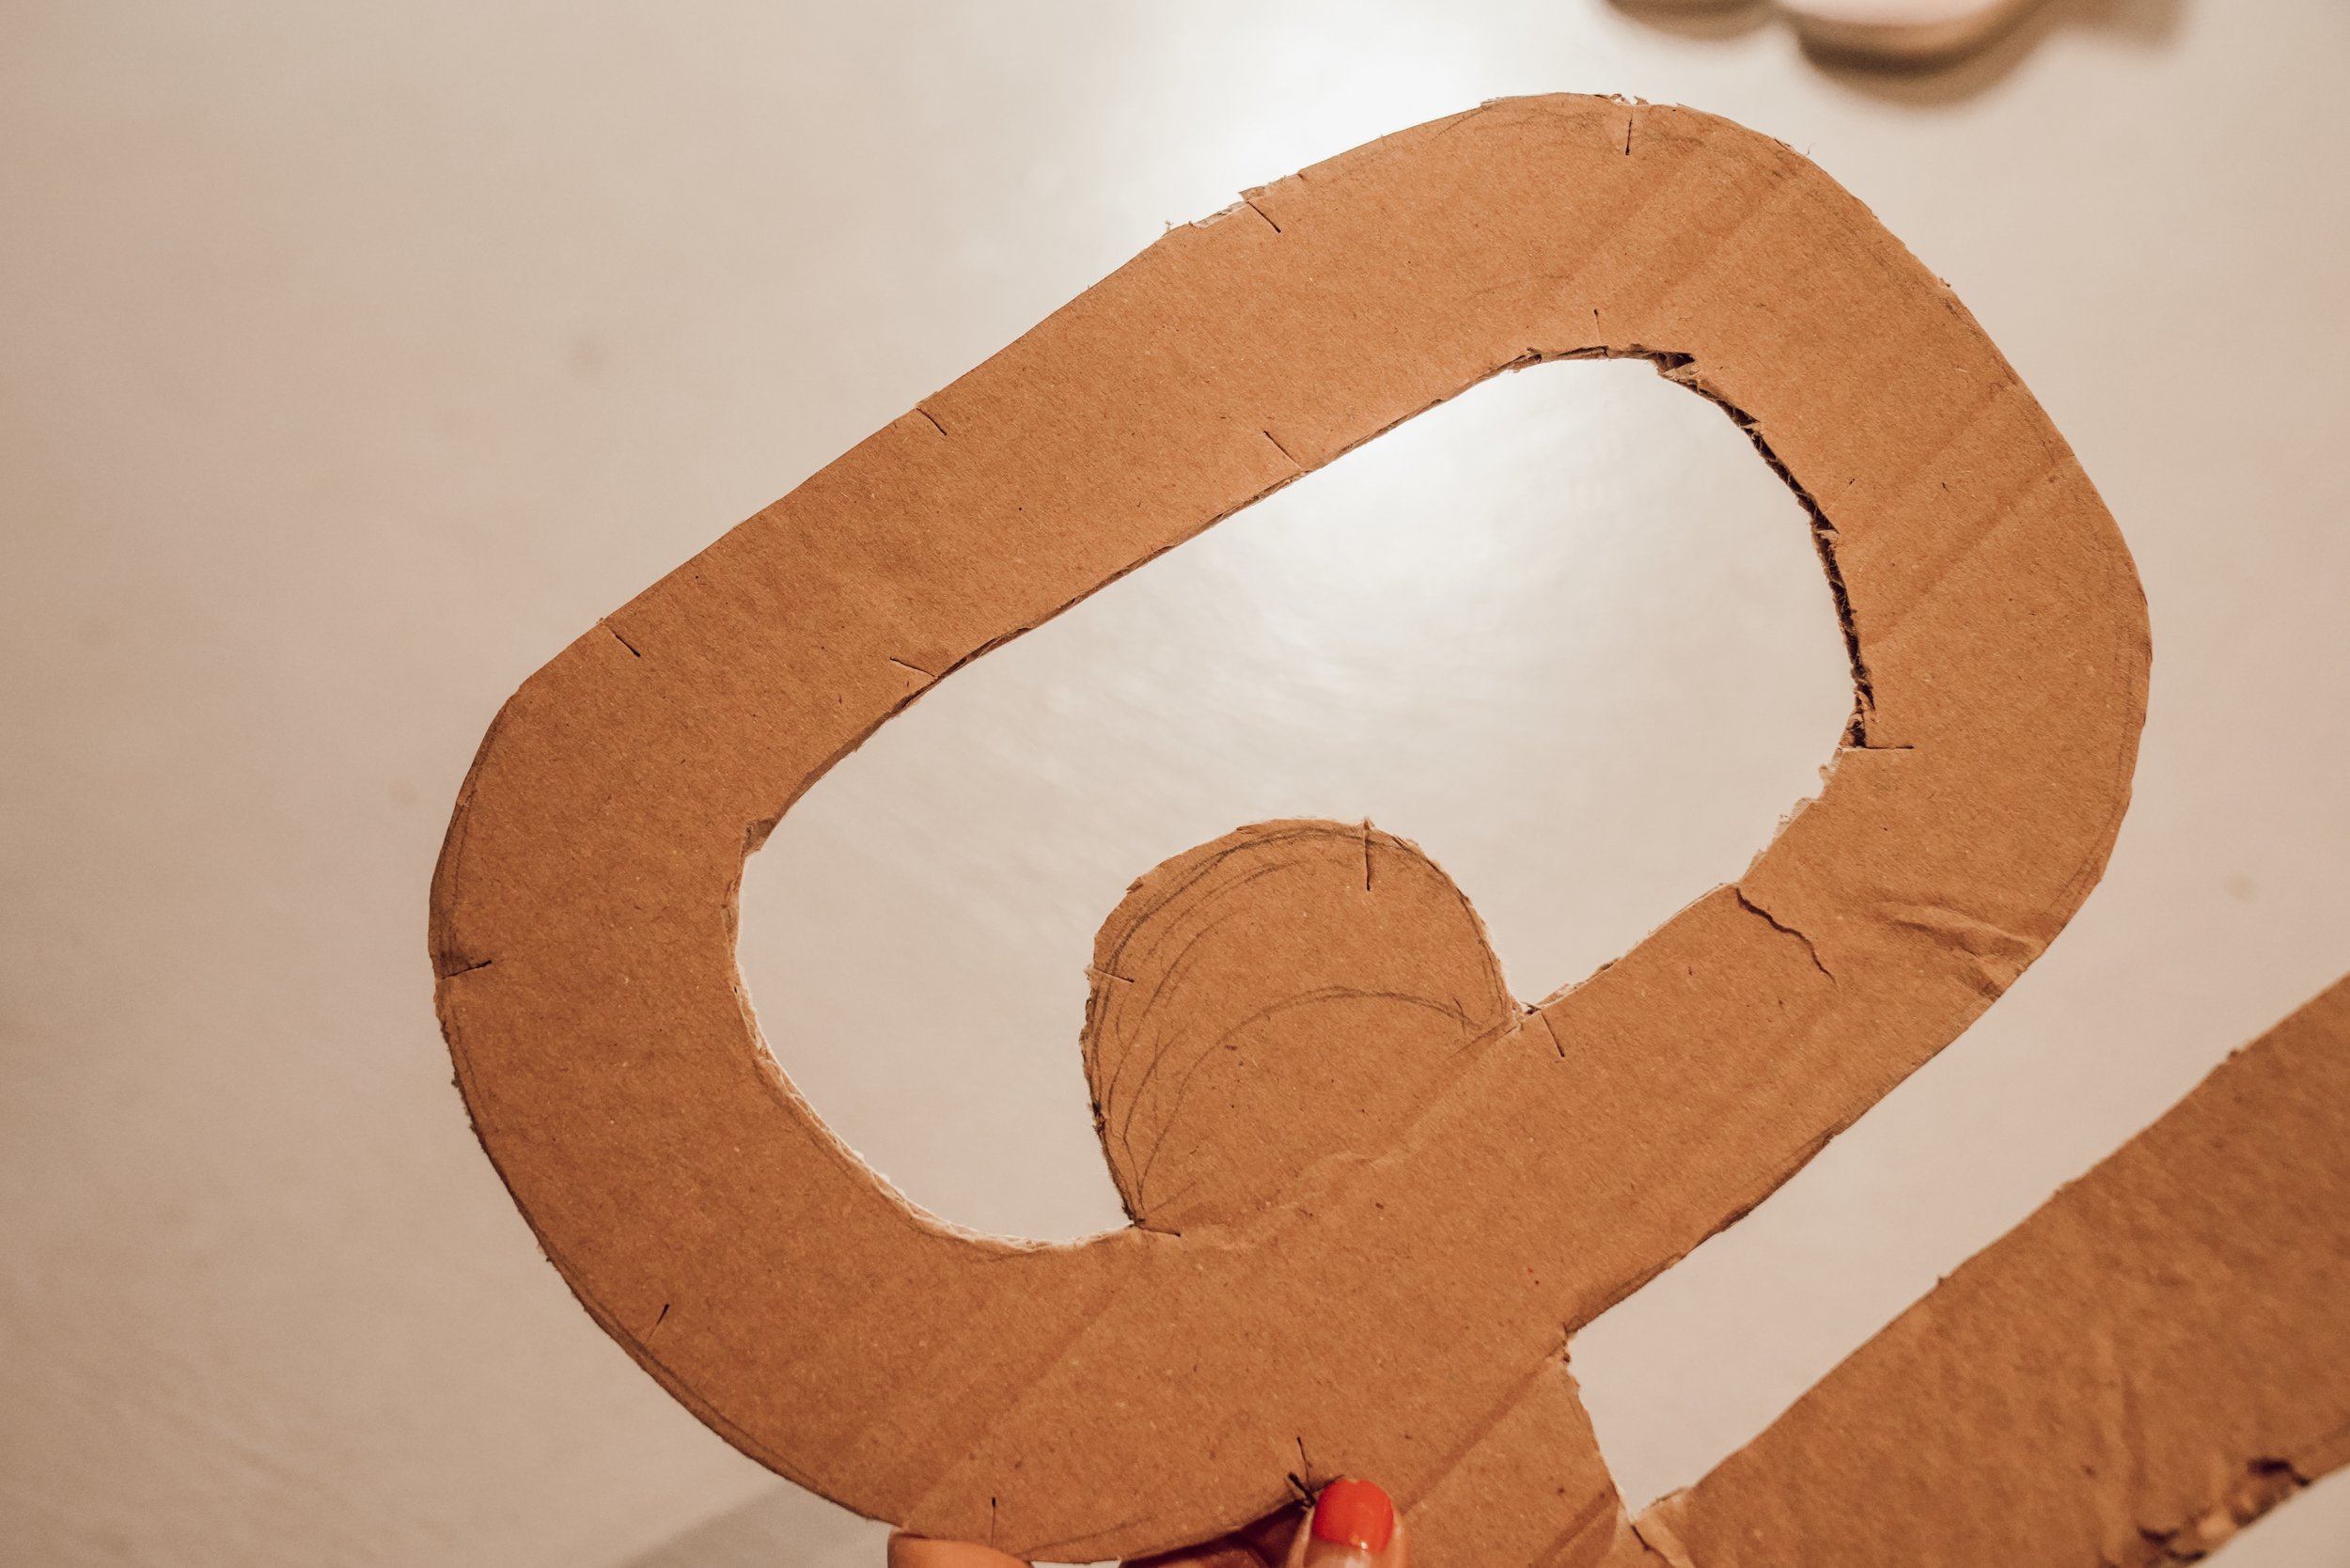
3. Cut 1/2 centimeter slits
Cut out 1/2 centimeter slits that are 2 inches apart from each other all around the letters. You will eventually stick LED lights into these slits..
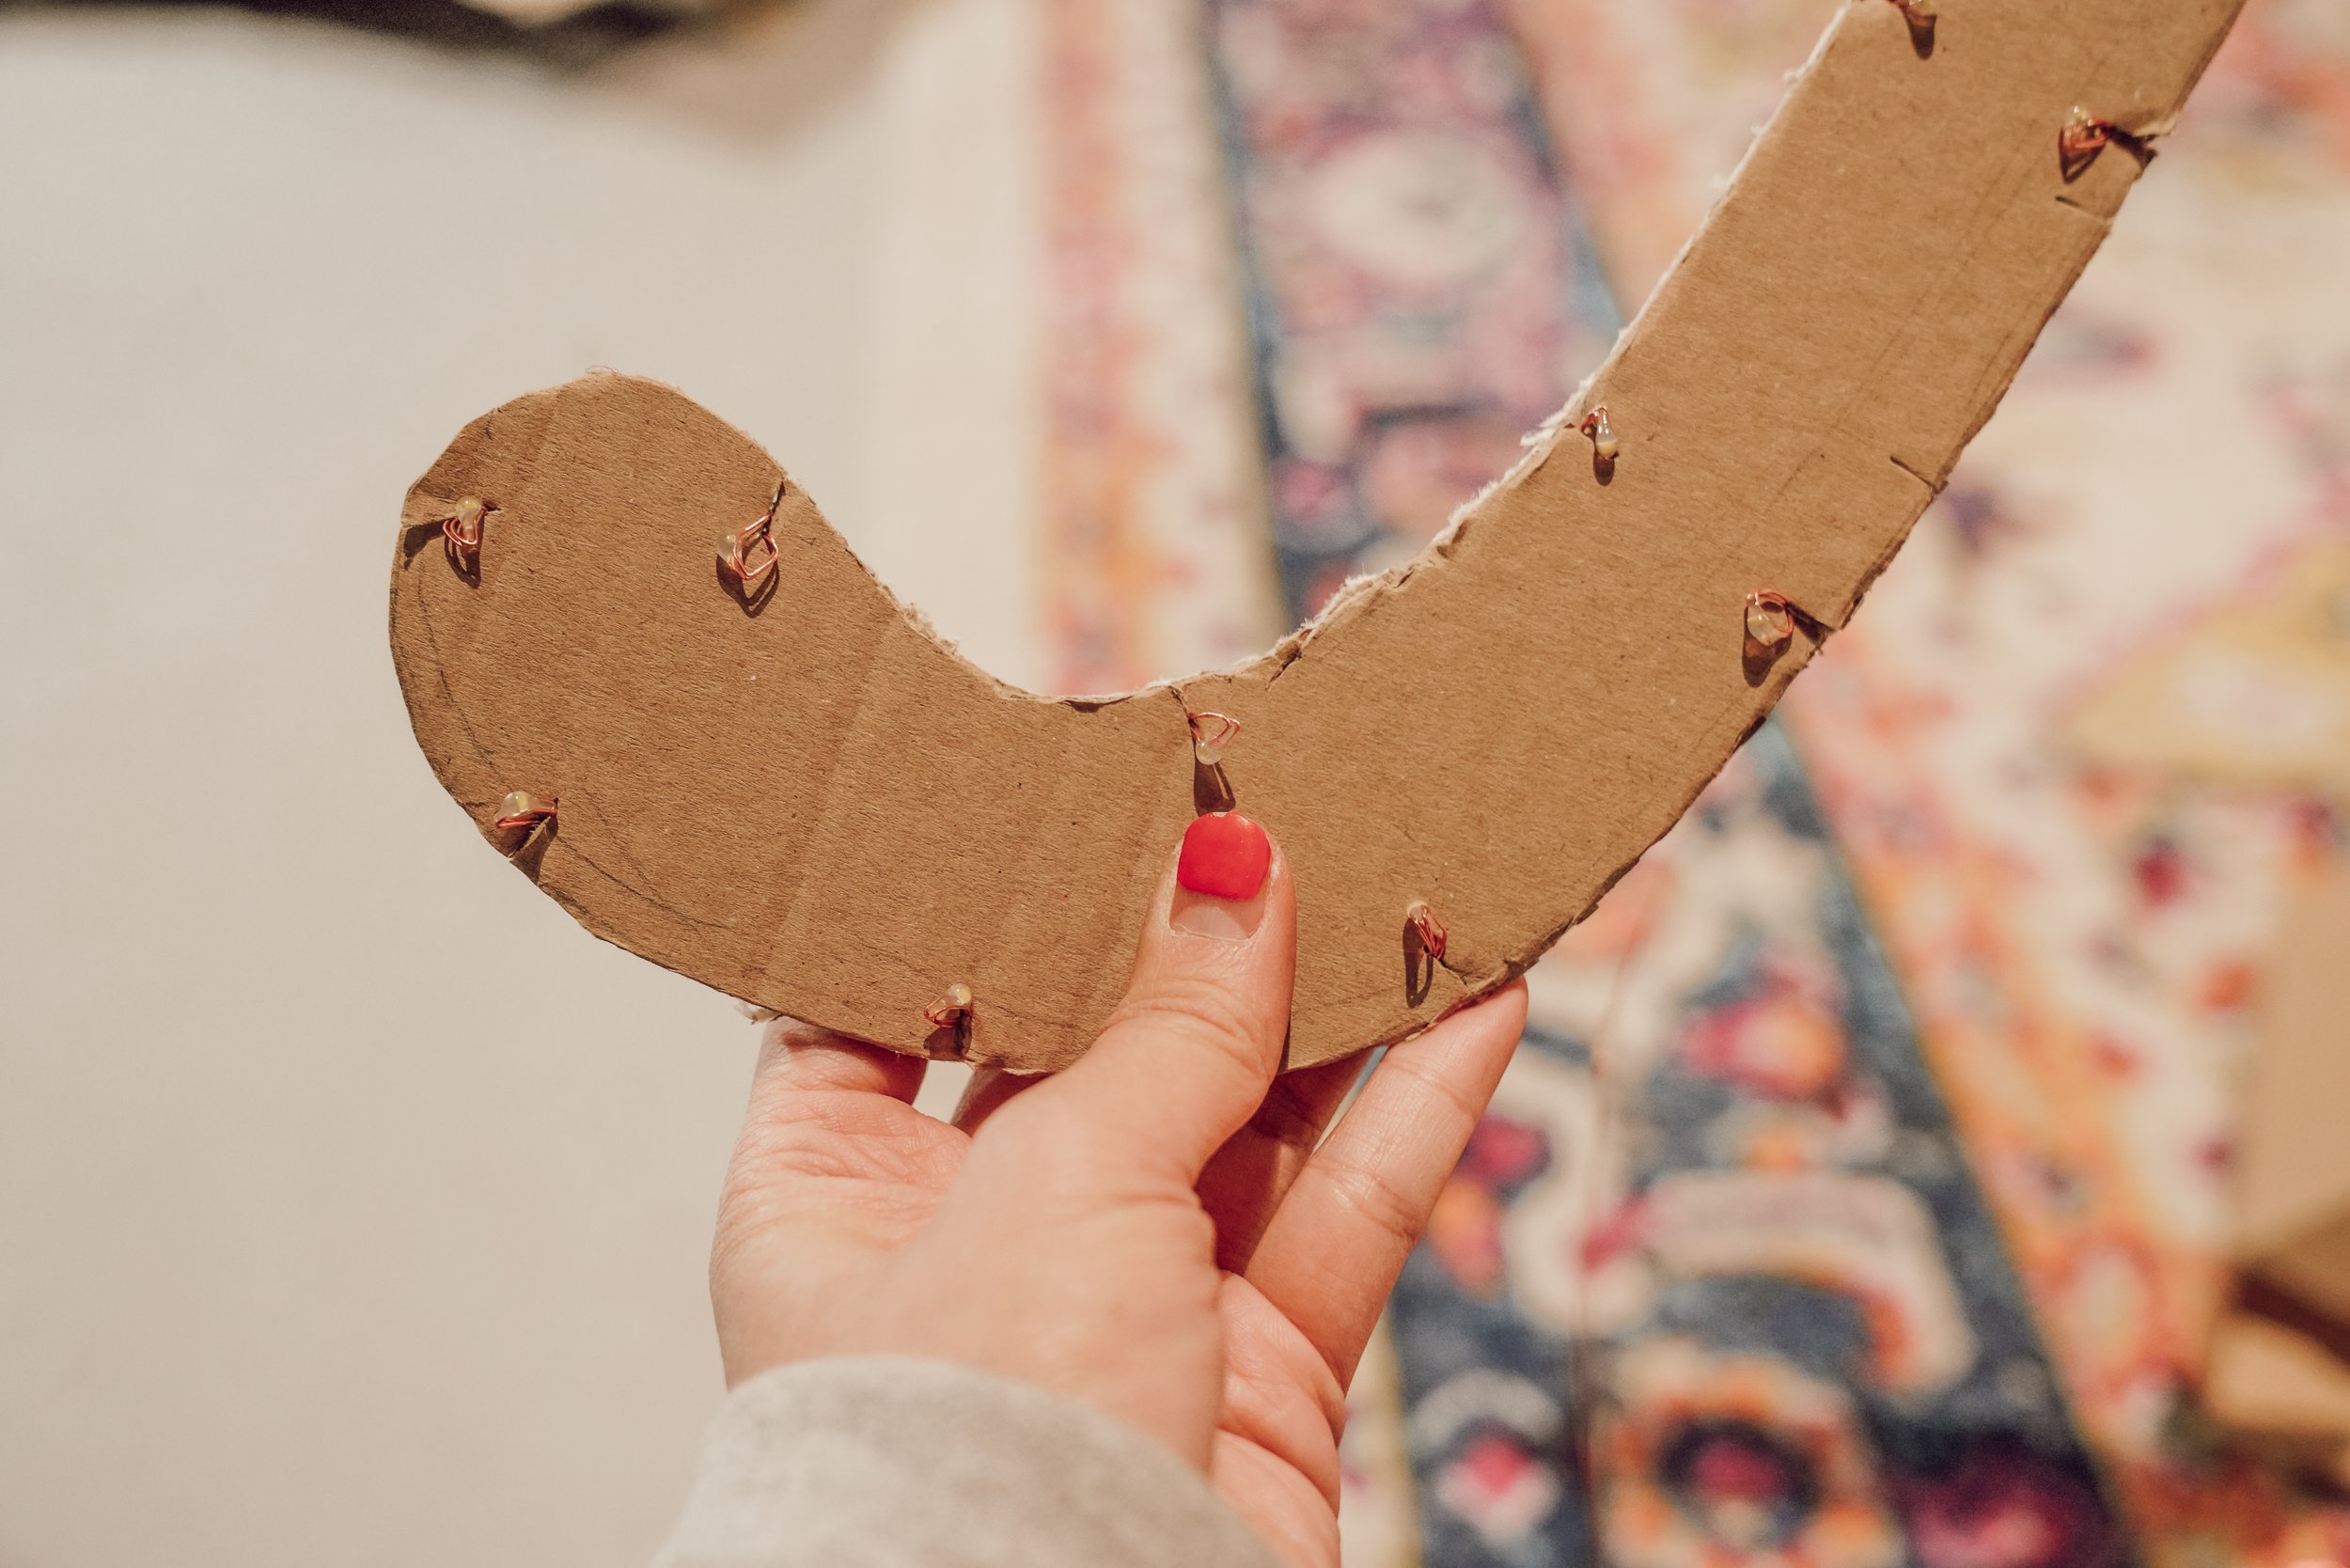
4. Insert LED Lights
With your fairy lights, work around the letters by inserting an LED wherever there are slits. Your fairy light string should be made of copper, so it can easily bend and stay in place behind the marquee sign without tape.

With the remaining lights, you can let it show, tape it with black tape so it won’t shine (like I did), or tape it all to the back of the marquee lights.
In the end, you should have a product that looks like this:


Voila!! I can’t wait to see what you create with this DIY tutorial. Please share it with us when you’re done!